Manage Your Workflows With Apache Airflow.
Write Your First Real-Time DAG In Python.

NOTE: This article is part of a series called — “Manage Your Workflows With Apache Airflow”. This is the second part of a two-part series. You should read the first part first.
part1: Introduction, Installation, and Setup Apache Airflow in Python
part2: Write Your First Real-Time DAG In Python.
In the previous article, we have installed and set up the environment to run our first DAG in Airflow. As an expectation, this article assumes you have the Airflow environment configured and all set to write and manage workflow.
In this follow-up post, I’d like to explain with the following agenda,
- Real-world problem statement
- Data Source Explanation
- Data Overview
- Write an ETL pipeline
- Write DAG to manage the ETL workflow
- Quality check
- Conclusion
Real-World Problem Statement:
We are going to operate a simple task of finding a real-world API where we can obtain the data in JSON format, next we’ll transform the data into required fields and at last save the transformed data to CSV format.
Data Source Explanation
With the rise of modern web app frameworks like React and Vue.js, more and more sites are using REST API to send and receive data, then render the final layout on the client-side.
For this whole process, we’ll extract the data from Zalando-UK , Men’s Bag category.
But wait! how do we catch the API which contains the product data?
- Many websites along with Zalando uses the concept of ‘one page displaying’. Open the webpage and inspect it. Go to the XHR of networks and reload the page. You can see a list of all of the requests which are the type of XHR (data specific). Analyze all network requests and hit the ‘next page’ button, the API request will be made.
- Once you get the API, copy the Curl and convert it to Python request from CrulTrillwork.

Let’s have a look, how the data looks like once you hit a GET request to the API:

Data Overview
We have successfully extracted the API, now it’s time to become Sherlock Holmes. Let’s analyze the data and find the field where all the product details are being stored. For simplicity, I’ll only consider the first page of the API.
If you look closely at the “API JSON data” image, all the products are stored inside the field called article. And it seems, it’s a list of dictionaries.
Yes, We got it right.
Let’s explore some useful fields to make our final CSV file,

Write an ETL pipeline
We need to understand few things before ETL,
What is DAG?

A DAG (Directed Acyclic Graph) is the core concept of Airflow, collecting each task together, organized with dependencies and relationships to say how they should run. For example, Here it defines four Tasks — A, B, C, and D — and dictates the order in which they have to run, and which tasks depend on what others.
Dag files should have
.pyextention and stored inside a folder nameddagswhere you have initiated the db.

- Let’s create a folder and create a python file and name it as
zalando_etl.py - Create a directory as
Data/csvto store your final output.
What is X-com?
XComs (short for “cross-communications”) is a mechanism that lets Tasks talk to each other. There is a method called “xcom_push” in airflow, that can send some values in the Xcom table in Apache Airflow Backend Database. This can be defined withti(task instance), which is used to identify the tasks.
As we are all set to write ETL pipeline, without further ado let’s define a couple of Python functions for Extracting, Transforming, and Loading this data.
Extraction:
This function will make GET requests to the API URL along with the given headers that we have collected from CrulTrillwork. Xcom-push will push the result as the value of the function.
Transform:
We need some preprocessing in this step. If you see the product URL filed and thumbnail field, they are not in proper URL format. We need to transform it into a proper URL.
1. url_key: “under-armour-weekend-bag-black-un244e055-q11” to “https://www.zalando.co.uk/under-armour-weekend-bag-black-un244e055-q11.html”2. path: “spp-media-p1/506932a1e2c740acb95444b7d9c84994/36e1a4ed9c5c4d9d884dd5297011595f.jpg” to "https://img01.ztat.net/article/spp-media-p1/506932a1e2c740acb95444b7d9c84994/36e1a4ed9c5c4d9d884dd5297011595f.jpg"
Load:
Finally, we need to define a function that will load the transformed data to a CSV file.
Write DAG to manage the ETL job
Yay! Now we can write the DAG in Airflow to run the 3 different jobs one after another. The script below is all we need to create the DAG file to perform the workflow.
Details about the code above:
- After defining all 3 ETL functions, we have defined the Tasks sequentially.
dag_idshould be unique for all the dags you’ll create in the future.- To execute Python callables always use the PythonOperator method.
- Task are sequentially defined with
>>symbols.
Let’s check whether the DAG has been listed by airflow or not. Activate your virtual environment for airflow and run the following command to check all the dags.
$ airflow dags list
You might see some other example dags on your list. But no worries, those are for demo purposes only. It’ll not make any changes to your zalando_workflow DAG.
Cool! Let’s open two separate shell tabs to run Scheduler and Webservice.
Start the Scheduler:
$ airflow scheduler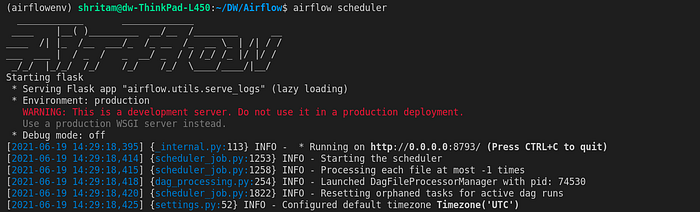
Start the WebServer
$ airflow webserver — port 8080 #default port is 8080
Now let’s visit localhost:8080 in the browser and you’d see the Airflow Webserver UI:

We are done with the DAG configuration. Let’s start the workflow, unpause the DAG and Trigger the DAG.

After triggering it, check the Graph View to track the workflow. You can check the status of each task by hovering on it. Once the workflow will get finished, all the task’s borders will be shown in the Green color, with the status as “Success”.
Quality check
Once the DAG run is successfully completed for today, you can see the CSV file will be generated under Data/csv directory.

Let’s read the CSV in Pandas data frame,

That’s great!
Conclusion:
Congratulations, your first real-world DAG with Airflow is live. I hope it was easy and helpful. Feel free to take this Airflow series as a reference and try it out with some other new sources.
I hope this article will create a motivation for you to write and manage your workflows with Apache Airflow 2.1.0.
Register for Airflow Summit 2021.
Thank you for reading!
Follow me on Medium for the latest updates. 😃